
How to Cold Smoked Trout.
In part one we discussed where to get the fish, tools, gutting, pin boning, filleting and the brining process. In part two it is all about the smoking, slicing and storage of your fish.
Your fillets are now brined, washed, maybe boned and ready for cold smoking. First up the smoker. I made mine from a couple of clean unpainted old wooden pallets I had at work. If you haven’t got the time, the will or the way then you can use a cardboard to do the job. I have never tried it but there is a simple YouTube video you can click here to watch DIY Cold Smoker . There are a whole host of “How to make a smoker” videos on YouTube so I would suggest taking a look at some. Just make sure the materials are clean with no tape or ink and well sealed with air holes to keep the smoke flowing.
how to hang your fillets
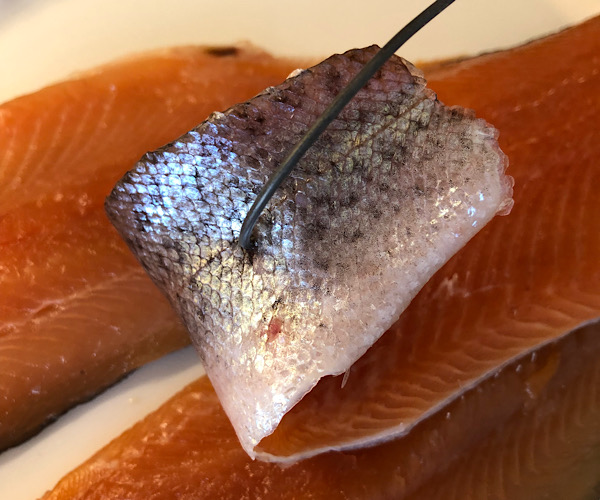 To hang the fillets, I made some fish hooks out of some old wire clothes hangers. Bend in an “S” shape and if you can sharpen one end. There are hooks available on eBay, just search for “smoking fish hooks”. They are not expensive and only take a few days to get delivered. Pierce the hook around 40mm from the tail end. They are now ready to hang in your smoker. Just keep everything simple.
What Wood
The internet is filled with articles and videos with people using all types of wood for smoking all types of foods. There is an absolutely huge range of smoking dusts and chips on the market including; Oak, Beech, Hickory, Cherry, Maple, Alder and Apple.
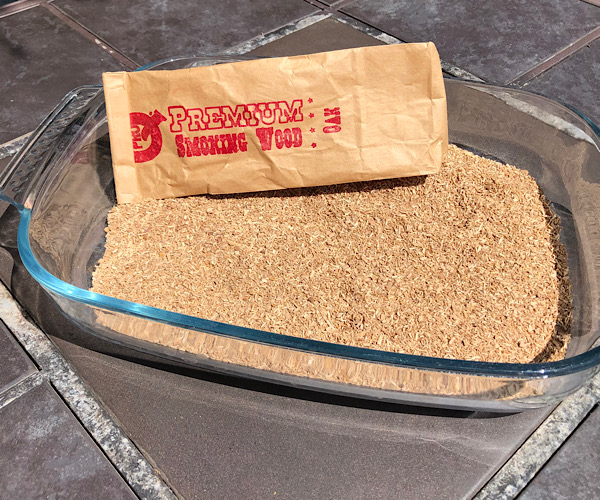 But avoid soft woods, such as Douglas Fir, Cyprus, Firs and Spruce as they contain resins and will leave nasty residues in your smoker and on your food. The smoked salmon you find in the supermarkets is usually Oak. I recently tried beech for the first time, but found it was too mild for my liking and tend to stick with oak as it’s full of flavour and the smoke time is quicker.
Creating Smoke
To create the smoke I place my smoke dust into a ProQ Smoke Generator. This is a clever device which allows the snake like design to keep the wood smoking for up to 10 hours. They are not cheap at around £35 or $45 but a great investment if you want to start smoking your own food. Remember you can use your smoking setup to smoke a whole range of foods including other fish, cheese, jerky, duck, chicken and turkey. There are other generator designs available that I guess are equally as effective but I haven’t tried them.
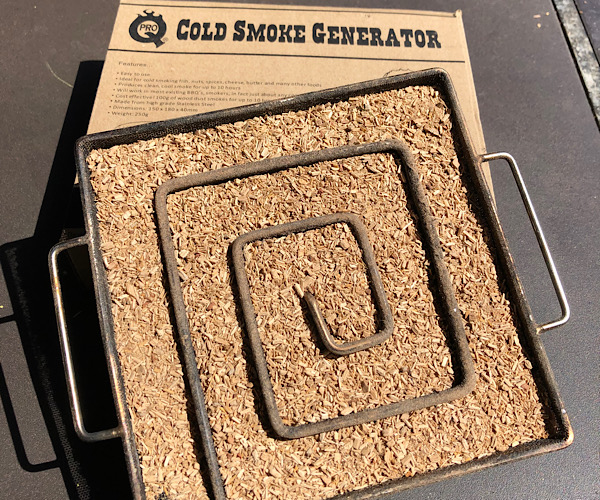
Following the instructions and light the generator. All you need is a tea light and a match. Make sure the smoke generator has caught light and been smoking for ten minutes then shut the door and wait. There should be a fine stream of smoke coming from the generator. You dont need lots because the box soon fills with smoke. The embers that cause the smoke will slowly work its way along all the dust over a few hours. A small amount of air needs to flow into the smoke box to keep the embers lit so make sure there are holes at the bottom of the smoker and a hole at the top. The YouTube videos will explain what you need.
TIP
Sometimes the smoke can go out. It is either two things. The dust has moisture or there isnt enough air flow. If there is enough air flowing it will probably be due to the dust or chips having moisture. I found the solution to this was to dry the dust in the oven on a tray for around twenty minutes removing any excess water. I always do this before smoking whether its a hot or cold day. It is always easier on a hot day but if you want to smoke all year round then you need to know the tricks of the trade.
Smoking guide
The smoking table below gives you an idea of smoking times, but you can play around so you can find your ideal smoke flavour.

Once smoked you can pull out the pin bones if you haven’t already. Run your fingers gently across the fillet. You will feel a long line of bone heads. There is a quick way of removing them. Cut out either side of the pin bones and removing a slither of flesh with the bones intact. Take some practice but ideal if you are smoking lots of fish. All you will lose is a slither if done correctly.
Slicing
Like most people I like to lay nice large slices of fish on my bagel. To do this with your trout you will need a very very sharp knife. Preferably a fish filling knife. The advantage of a dedicated fish filleting knife is that they can bend and is made of thinner steel. This allows a super sharp cutting edge and the flexibility to take long slithers of flesh without tearing. This is something you will need to get the knack of so practice will make permanent. If you have not got a filleting knife, just get the blade as shape as possible.
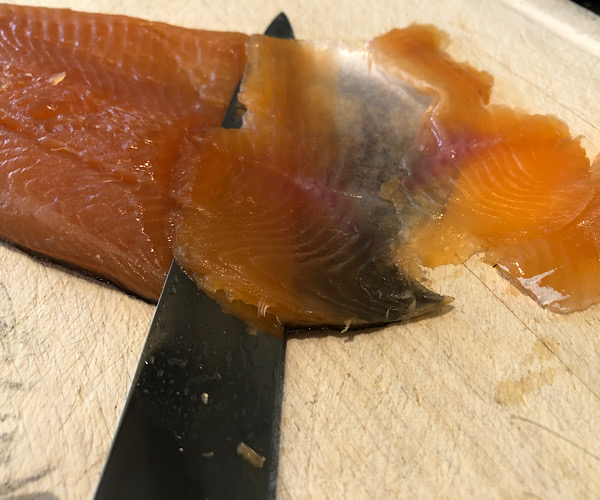
Start by holding fillet tail nearest you. Then slice your fish starting at the other end. Just as you get to the end of each slither really take the angle down so the knife finishes above the skin and does not cut through it. It does not matter if it does as you can just trim any skin off after. Ideally you will just be left with a piece of skin.
storage
Cold smoked trout and salmon can easily be stored in the freezer. I tend to bag a couple of fillets in a resealable bag and mark up the date it was made. They defrost in around twenty minutes at room temperature.
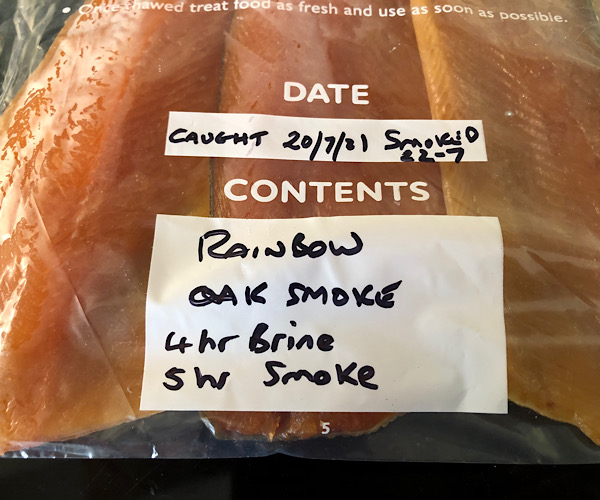
You can slice the fillets before freezing but I like to keep the fillet whole to keep all the tasty, healthy oils inside the flesh. Because you can freeze your catch you will have smoked fish for the whole of the winter if you catch enough. So, there it is, an easy cold smoked trout recipe. Have a go and persevere. It is so satisfying catching and preparing your own smoked fish.
Good luck.
Click here to learn more about Hanningfield Trout Fishing
Click here for my to read my article Spinning for Reservoir Trout
